
Meet the living subject or observe the natural phenomenon first. Ask a few questions aloud and give students time to discover what observation can answer. Leave the unanswered questions for later research. A sketch or written narration belongs in a paper nature journal.
This historical lesson is reproduced as a source, not as current animal-care, collecting, medical, or experiment advice. Observe wildlife without disturbing it, follow local rules, and check present-day safety guidance before any hands-on work. Never look directly at the Sun.
01How to use this lessonA short field guide for the adult
Let the subject lead.
Read the teacher material in advance if possible. During observation, select only the questions the student can investigate today. Do not answer on the student’s behalf while there is still something to see, hear, compare, or measure safely. Afterward, invite an oral narration or a picture in a paper nature journal. Discuss remaining questions only once observation is complete.
02The teacher’s readingComstock’s original preparatory text
The teacher’s reading
Text from the original handbook. Page markers are omitted; layout is adapted for reading. The source may reflect 1911 knowledge and practices.
This lesson has no separate teacher story. Read Comstock’s introduction and method in the original lesson below before meeting the subject.
03The original lesson and questionsTake these to the subject itself
Questions to explore
Choose what fits this encounter. Some original prompts ask for collecting, handling, or other historical activities; use a safe observation instead. Write or draw only in a paper nature journal.
How to Make a Sundial
Method—The diagram for the dial is a lesson in mechanical drawing. Each pupil should construct a gnomon (no-mon) of cardboard, and should make a drawing of the face of the dial upon paper. Then the sundial may be constructed by the help of the more skillful in the class. It should be made and set up by the pupils. A sundial in the school grounds may be made a center of interest and an object of beauty as well.
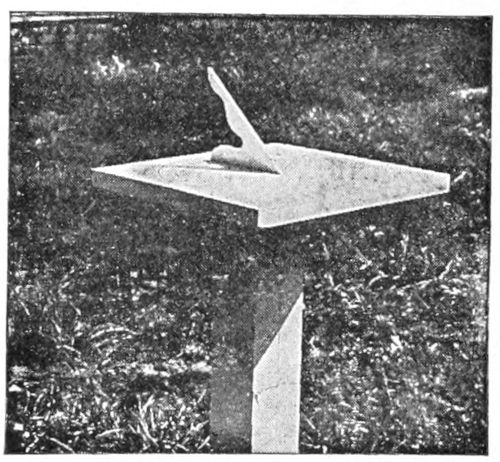
A sundial made by pupils.
Materials—For the gnomon a piece of board a half inch thick and six inches square is required. It should be given several coats of white paint so that it will not warp. For the dial, take a board about 14 inches square and an inch or more thick. The lower edge may be bevelled if desired. This should be given three coats of white paint, so that it will not warp and check.

The gnomon.
To make the gnomon—The word gnomon is from a Greek word meaning “one who knows.” It is the hand of the sundial, which throws its shadow on the face of the dial, indicating the hour. Take a piece of board six inches square, and be very sure its angles are right angles. Let s, t, u, v represent the four angles; draw on it a quarter of a circle from s to u with a radius equal to the line vs. Then with a cardboard protractor, costing fifteen cents, or by working it out without any help except knowing that a right angle is 900, draw the line vw making the angle at x the same as the degree of latitude where the sundial is to be placed. At Ithaca the latitude is 42°, 27′ and the angle at x measures 42° 27′. Then the board should be cut off at the line vw, and later the edge sw may be cut in some ornamental pattern.
To make the dial—Take the painted board 14 inches square and find its exact center, y. Draw on it with a pencil the line A A″ a foot long and one-fourth inch at the left of the center. Then draw the line B B″ exactly parallel to the line A A″ and a half inch to the right of it. These lines should be one-half inch apart—which is just the thickness of the gnomon. If the gnomon were only one-fourth inch thick, then these lines should be one-fourth inch apart, etc.
With a compass, or a pencil fastened to a string, draw the half-circle A A′ A″ with a radius of six inches with the point C for its center. Draw a similar half-circle B B′ B″ opposite with c′ for its center. Then draw the half-circle from D, D′, D″, from c with a radius of five and three-quarter inches. Then draw similarly from c′ the half-circle E, E′, E″. Then draw from c the half-circle F, F′, F″ with a radius of five inches and a similar half-circle G, G′, G″ from c′ as a center.
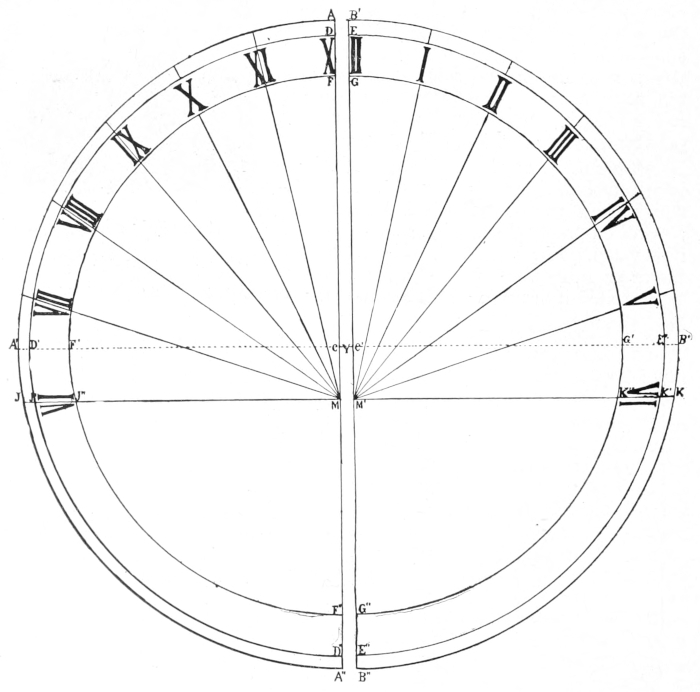
The face of the sundial.
Find the points M, M′ just six inches from the points F, G; draw the line J, K through M, M′ exactly at right angles to the line A, A′. This will mark the six o’clock point so the figures VI may be placed on it in the space between the two inner circles. The noon mark XII should be placed as indicated (the “X” at D, F, the “II” at E, G). With black paint outline all the semi-circles and figures.
To set up the sundial—Fasten the base of the gnomon by screws or brads to the dial with the point s of the gnomon at F, G, and the point v of the gnomon at M, M′, so that the point W is up in the air. Set the dial on some perfectly level standard with the line A, A″ extending exactly north and south. If no compass is available, wait until noon and set the dial so that the shadow from W will fall exactly between the points A, B, and this will mean that the dial is set exactly right. Then with a good watch note the points on the arc E, K′, on which the shadow falls at one, two, three, four, and five o’clock: and in the morning the points on the arc J′ D on which the shadow falls at seven, eight, nine, ten and eleven o’clock. Draw lines from M to these points, and lines from M′ to the points on the arc E K′. Then place the figures on the dial as indicated in the spaces between the two inner circles. The space between the two outer circles may be marked with lines indicating the half and quarter hours. The figures should be outlined in pencil and then painted with black paint, or carved in the wood and then painted.
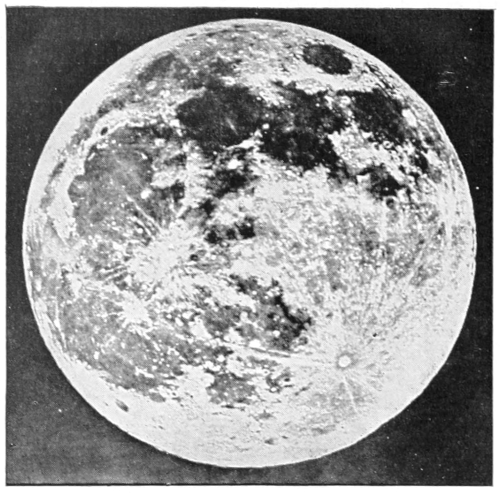
A photograph of the moon.
Comstock, Handbook of Nature-Study, Lesson CCXXXIII. Read the illustrated original at Project Gutenberg. Public domain in the United States.